DIY Gift Tags


Gift wrapping is my thing. Each year when I was growing up, I was the one that was responsible for wrapping the family's presents. I love planning out colour schemes each year and there's something about folding sharp corners that I find strangely meditative. This year I took advantge of still being on maternity leave to make my own gift tags. 


I found this set of rubber letter stamps at a flea market years ago and it's one of those things that I've hung onto, even though I've never really had a good use for them. I had modelling clay left over from another project, so hand-stamped clay gift tags seemed like a good way to use up the left over clay. If you don't have letter stamps you could easily write the recipient's name in clay using a pencil or toothpick, or use any holiday stamps that you might have lying around.

MATERIALS
air-drying modelling clay
stamps
straw
fine-grade sand paper
metallic paint


DIRECTIONS
  1. Break off a small piece of clay and roll into a small ball (around the size of a cherry).
  2. Roll out the clay into a small disc using a rolling pin.
  3. Use the straw to punch out a small hole for the ribbon at the top.
  4. Let the tags dry over night, or according to manufacturer's instructions. When the tags are dry, sand out any rough edges and finish with metallic paint.

I could live here…


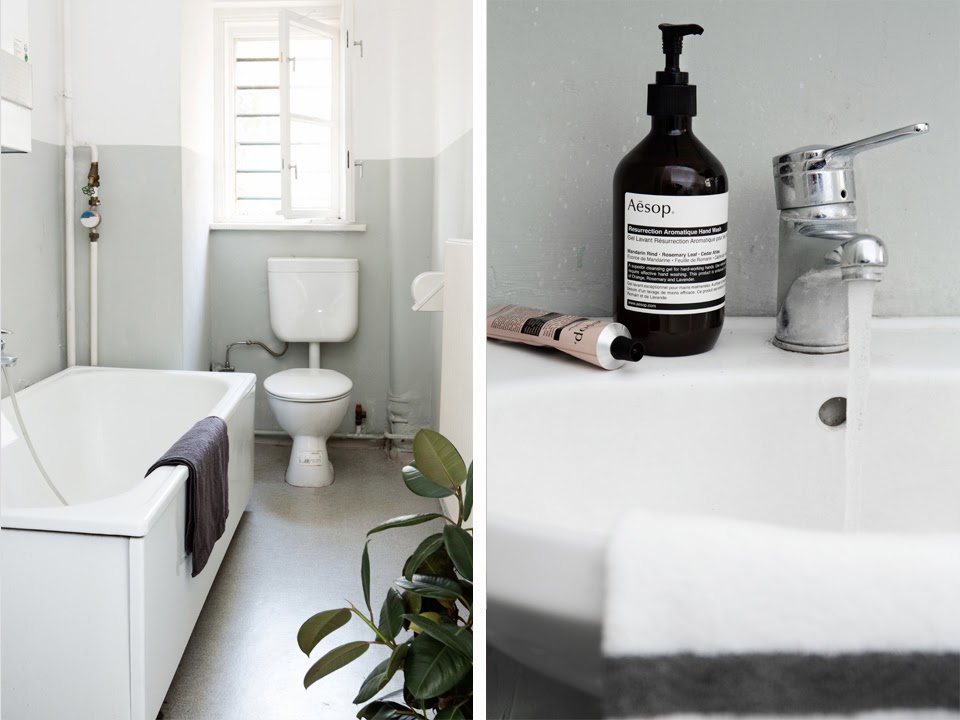
I could happily move into this little flat in Berlin. And convieniently, it's for sale. Anyone out there with 100,000 euros to spare?


Fantastic Frank is so spot on with the styling on all their apartments, it's hard to believe that more real estate agents aren't following suit. It's so much more inviting that the standard, terribly phtotgraphed pictures that you usually see. If my real estate agent had taken pictures like this of the place we rent I might have been less relucant to fork over two month's rent (!! can you believe they used to charge three months rent here!!) for her fees.


All images via Fantastic Frank

DIY Pumpkin Spiced Latte


Everyone is going nuts for the Pumpkin Spiced Latte at Starbucks at the moment. Something about it just screams "Fall" to me and it helps make the tranition from tha last days of summer into cooler weather a little more bearable. But as much as I love it, I almost never order one at Starbucks – a tall costs nearly 5 euros and while I couldn't find the actual ingredients listed online, I'm pretty sure that it's full of additives and corn syrup... Since we always have pumpkin in the house (thanks to in-laws with an amazing veggie garden + a pumpkin-loving baby) it seemed like the perfect opportunity to make my own. I loosely based my recipe on a version found over at A Beautiful Mess


  • 1 cup water
  • 1 cup sugar
  • 2 cinnamon sticks
  • 1 teaspoon gingerbread spice (although if you have pumpkin pie spices, they would work here too)
  • a couple cloves
  • 2 tablespoons pumpkin puree

Combine all the ingredients in a small pot on the stove and whisk until the sugar has dissolved. Continue stirring over a low heat for around 5 minutes, not letting the syrup boil. Strain the syrup and store in an air-tight container in the fridge. To serve I add 1 tablespoon to my espresso before I add the steamed milk to my cappuccino. If you like your coffee on the sweeter side, add another tablespoon. (It's important not to let the mixture boil, I ignored this step in my first batch and the syrup was much too thick, making it difficult to strain afterwards...)


The hardest part has been not drinking three of these in a day, definitely much more tempting knowing that the syrup is sitting in my fridge! 

Cooking the Internet #2 | Grape Jelly


One of obvious perks about having a father-in-law that's a hobby wine-maker is the free wine... Another is the grapes. Grape season is in full force over here and we've been innundated with this year's crop. Faced with more grapes than we could ever possibly eat ourselves, it only seemed fitting that I use them for my first foray into jam-making.

This recipe is also one of those classic what-on-earth-did-we-do-before-the-internet moments. The process of looking at the grapes, thinking about jam, googling a recipe and starting the juice extraction process was about 5 mins... I can hardly even remember what I would have done before – gone to the library? Or more likely the grapes would have gone mouldy before we could eat them all and they would have ended up in the bin. So hooray for the internet!

It's a two-day process and the finally jam is a bit on the sweet side, but slathered on whole wheat bread with cold butter it's delicious. Jam-making was so much easier than I expected that I'll definitely be making it again (and I don't know why I was so nervous about making my own jam...) Paired with homemade almond butter it would also make a cute housewarming gift.
  • 1kg red grapes, preferable with seeds (stripped from the stalks) I used mixture of white and red since that's what I had on hand
  • 450g 2:1 jam sugar
  • juice of 2 lemons
  1. Tip the grapes into a large saucepan set over a low heat, then cover and leave to gently cook for 5 mins until the juices start to run. Take a potato masher and mash up the grapes. Leave to cook for about 10 mins more, mashing every now and again until the grapes are falling apart. Place a clean tea towel in a sieve set over a bowl, then pour the grape mixture into this. Let the mixture drip through overnight. 
  2. Measure out the juice (you should have about 600ml) and pour it into a pan along with the sugar and lemon juice. Set the pan over a high heat and bring to the boil. Let the mixture bubble for around 7 minutes. Put a small plate in the freezer for 5 mins, then pour a little of the juice onto the cold saucer. After 1 min, run your finger through; if the jam wrinkles slightly, it’s ready. Pour the hot jam into a sterilised jar. Will keep unopened for up to 3 months.
 Adapted slightly from the recipe found here.
 

Link Love 10.11.2013


If there's just one thing you watch this weekend and it's this interview with James Murphy, talking about failure, and how many tries it took him to get where he is today. I love this quote, and think it's something that's so relateable for so many people. I was always someone who found school and uni fairly easy, so landing in the "real world" and having to motivate myself to do more than just coast by was always (and sometimes still is) so hard…
"I was lazy. But ‘lazy’ never felt right when I heard that, when I said that to myself. ‘Oh, you’re lazy.’ It wasn’t that I was lazy, I was just really afraid. I was really afraid of failing. All my life I had been precocious and I was supposed to be smart and I was supposed to be creative. And I think hearing those things, makes you scared that you’re going to do something stupid or do something uninteresting and no one will see you as smart or creative anymore."
I was going to post a few other links, but actually, just watch that. And enjoy the weekend... I'm planning on hitting up an art fair and attempting to reupholster a chair for the kitchen. Wish me luck!

Weekly Quote #3


This week's quote is in honor of Marc Jacobs and his last show for Louis Vuitton. (A week late, but things have been crazy busy lately...) The Sartorialist has, as always, some stunning photos from the final collection. And you can watch the show at Refinery 29. Amazing opulent, dark set that referenced his 16 years at the fashion house. Carousel, escalators, black shag carpeting... I'm definitely not fashion-forward, but it's hard not to love this kind of glorious commitment to fashion and set design.

Design Inspiration

Handwritten text in magazines is hardly a new trend, it's been around for years, but that doesn't mean I love it any less. I was doing research for an ad for my husband's salon and I was drawn to these handwritten editorial styles.

Everything is so super digital now, that's it's a nice change to make something with my hands and get out the watercolours and 0.3 micropens.


Weekend in Pictures

This weekend was a bit of a quiet one. My parents were here for a quick visit to see the little one, so we went on lots of walks and spent our time playing with her new favourite toy and (finally) mastered sitting up without tipping over.

Before they arrived I headed over to the MAK to check out the 100 Beste Plakate exhibition. I've been to this annual exhibition for the past few years, but unfortunately this year it was tucked away in the smallest room in the Museum, which made it really difficult to stand back and appreciate the posters. Even though the show could have been better it was still nice to check out the posters and get some inspiration – hopefully they'll be back in the big hall next year. All in all a successful weekend.

Took advantage of having the car and made a quick trip to IKEA. I think for the first time ever I managed to leave without buying anything that wasn't on the list, not even napkins! Pretty proud of my self-restraint. Can't leave without a hot dog though!

Finally getting the kitchen finalised. Still have a few bits and pieces to work on, but it's about 90% there. Hopefully I'll be able to post the big reveal soon...

Fresh flowers always bring a table to life, need to buy them more often!


DECOR DIY / learning to love what you got


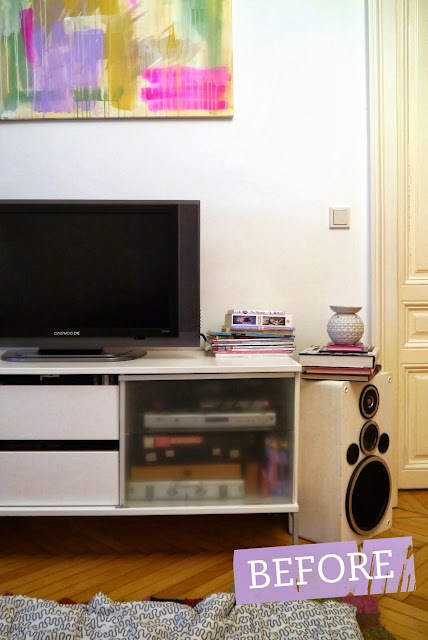
This TV stand has bothered me since I moved in with my then-boyfriend-now-husband over three (!) years ago. It was one of those things that I thought we'd replace eventually but it was never a top priority so here we are, years later and the TV stand is still taunting me. The problem is that there's nothing really wrong with it. It's IKEA, but its not broken and while I don't like it, there's also nothing so offensive about it to justify throwing it out and spending money on a new one.

So what's a girl to do in a situation like this? I initially thought that I'd replace the sliding glass doors with plywood ones, but a little research quickly made it clear that that kind of IKEA hack was going to end up being time consuming and expensive. The next thought was to paint the glass, but we already have so many colourful pieces in the living room, that adding more seemed like overkill...

The solution? Wood-effect contact paper. Less than 8 euros worth of the stuff to be exact. I had the idea and figured that I'd see what they had on offer at the local hardware store, sort of convinced that it would be awful and that I'd have to go back to the drawing board. Suprisingly, it wasn't half bad... (in fact, I was so excited about trying it out that I did one of the doors before realising that I needed a before picture if I wanted to show a before/after).

Obviously, up close no one would ever mistake it for wood, but when you sit on the sofa, it actually looks fairly decent, and more importantly it hides the mess of cables, playstations etc. that are hiding behind the sliding doors. The faux wood texture made it really easy to apply and hides the odd tiny air bubble (not like the metallic gold that I also bought for another project, that shows every. tiny. mistake and bubble...) I'd still like to replace it at some point, but it's been given a stay of execution for now.

Sunday Scenes #1

A healthy start to the day… Can't say the same for the end of the day, which I finished with a piece of raspberry cake. No regrets though, it tasted amazing.

Made the most of the gorgeous weather with a walk in the Donaupark, probably my 2nd favourite park in Vienna (Prater will always be my number 1...)

Starting to really feel like autumn, even got a chance to wear my favourite wooly cardigan today.

May have gotten a little over-excited with the spray paint… but it was worth it. I'll post pictures of the kitchen as soon as I finish hanging the last picture, but it's nice to have everything finally come together. It takes me absolutely ages to finish projects and then I'm so happy when it's done, I wonder why I didn't make the changes sooner.

Tatort! Sunday evening must-see TV.


Five for the Weekend

LIFE Magazine


Five links for the weekend:

• How Hemingway liked his burger (via Kottke)

The Designer's Dilemma. So true...

• I still keep going back to look at this kitchen renovations. It's amazing how they transformed the space on a tiny budget.

• I NEED this table by Matt Ines (via swissmiss)

• If you're as Breaking Bad obsessed as I am, NYMag has been providing some really in-depth commentary and analysis.

Enjoy the weekend. I'll be trying to finish up a few projects around the flat before my parents arrive next weekend – mainly trying to decide if the changes I made to our TV sideboard thing are good or awful... the jury's still out. And finally spray paint the picture frames for the kitchen, which I've been meaning to do since the last time my parents visited 3 months ago (oops!).

Feeling: Florals


{ 1. Gorgeous florals by Moon Canyon Design 2. Cute photoshop tutorial from Pugly Pixel 3. Animal print by Catherine Ledner 4. Give back-to-school a pretty touch with pens from Poketo 5. Rifle Paper Co's lush iPhone cover 6. Tough Doc Martens soften up with delicate flowers 7. Loving this metallic leather fold-over clutch from Anthom }

I'm not usually one for super-girly floral patterns, but every now and then I like to add a feminine touch to my otherwise very sporty day-to-day look. Maybe it has to do with having a daughter, but I'm slowly starting to open up to more girly elements. I'm definitely not quite ready to commit to a full on floral dress, but a bag or and iPhone cover? That's something I can manage...

Roasted Pumpkin Soup


I started this post off by editing video of our Picnic in Prater last weekend. It was supposed to be an ode to the Indian Summer. Then it started raining, and I had to swap my sandals for boots... So I made pumpkin soup instead, which really isn't the worst day way to spend a rainy afternoon.

I make variations of this soup, sometimes with Thai curry paste and coconut milk and sometimes with butter and lots of thyme.


  • 1 medium pumpkin (I use Hokkaido) cut into slices
  • 2 tbsp olive oil
  • 8 garlic cloves
  • 1 tsp cumin
  • 1 tsp cinnamon

Lay the pumpkin slices together with the garlic cloves (whole with the skin on) on a baking tray and drizzle witht the olive oil and season with salt and pepper. Place them in a 200°C degree oven for around 35 minutes until they are soft and browned. Remove from the oven and squeeze the roasted garlic into a pan, along with the pumpkin. Top with 1L hot water (or stock if you prefer). Using a blender or hand mixer, liquidise in batches until completely smooth. Add the cumin and cinnamon and season to taste with salt and pepper.

Enjoy while searching online for the perfect fall coat...

Weekly Quote #2


This week's quote comes courtesy of the amazing 40 Days of Dating project. Two designers, Jessica Walsh and Tim Goodman, decided to date each other for 40 days to see if they could change their dating habits. The project ended last week, but it's definitely worth setting aside a block of time to read from day one. It's so interesting to read a his & hers version of the same relationship.

It also doesn't hurt that the project features some amazing illustrations from the likes of Erik Marinovich, Siggi Eggertsson and Jessica Hische.

Oh Vienna! | Vorgartenmarkt

 
One of the things I love about living in Vienna are the little local markets in the districts. Of course Naschmarkt is lovely, but actually buying groceries there? The crowds of tourists are enough to scare of even the most determined shopper... One of the things that I missed when we lived in our old flat was not having a local market, so I was super-excited to discover the Vorgartenmarkt when we moved to the 2nd district last year.

The market was initially in need of a little loving attention, with pensioners making up the majority of the customers but when tewa (which I love so much I'll cover in a seperate post) moved in, a few other stands popped up, including an organic butcher, coffee shop and Adamah organic grocers. Now on Friday and Saturday when the farmer's stands are there, the market is full of young families and the odd hipster. Say what you want about gentrification, but it's nice to see the Vorgartenmarkt being brought back to life.


Cooking the Internet #1 | Tomato Tartin

Although I love my cookbooks, more often than not I end up searching the web for new recipes. This is an attempt to document the process and excellent motivation for me to try new dishes.

The first in this series comes from Design*Sponge via a new-to-me duo called Whip + Click. I stumbled across this recipe at just the right time, with the nearly 2 kilos of tomatoes from my mother-in-law’s garden calling out to be used for something other than a tomato sauce. While this tart definitely made a nice dent in the supply, I’m looking forward to having beefsteak tomato and chedder sandwiches (my favourite!) for lunch for the next few days. The tart has the added bonus of helping me to slowly conquer my fear of pastry crust. This one turned out gorgeously, and paired with near-melting tomatoes that benefit from nearly an hour in the oven the only downside is that our tomato season is drawing to a close… Get the recipe here

Weekly Quote #1


A quote that I can take to heart. Everything is so edited, curated and styled nowadays that it's easy to get caught up in making things perfect. This ideal can often be a hurdle in getting things done. I know I get frustrated when my projects don't match up to the styled images on pinterest. But of course the only way to get better is to practice – so here's my first attempt at letting go...